Wednesday, September 25, 2013

Quick Pickle - Easy Spicy Cucumber recipe

I haven't made this in a while, but when my neighbor's cucumber vine meandered over to my side of the fence, I knew exactly what I'd be doing with any bounty that grew on my side (and yes, she knows it's over here, and no, she doesn't mind).
This is the cucumber vine. The one I cut was hanging from that little piece of vine 1/2 way up

I have a real *thing* for fruits and veggies coming right off a tree or plant (could be anywhere, belonging to anyone) that I'm not really ready to share with you just yet, but suffice it to say that growing a few fruits and veggies in my own backyard just totally tickles me!  And, um, keeps me out of trouble...
 
Here's the first (and only) cucumber on my side, so far:


I think it must've weighed 2lbs?
 
The "recipe" isn't really a recipe, more of a technique.  I learned it from the amazing folks at The Q restaurant and bar (formerly called BarBersQ) in Napa, CA. If you are in Napa, you MUST go here.

The first time I was there, in 2009, they had pickled cucumbers as a side dish to their delicious barbequed meats, and I was so overwhelmed by the perfect blend of sour and spicy and crunchy, I had to get the recipe.

 
So, here is my version, because while I'd love to keep this as a secret weapon in my cooking arsenal, it's too good not to share.
 
Ingredients:
cucumber (regular or English/hothouse. If you use an English cuke, peel every other strip off of it, for better flavor penetration).
red onion
jalapeno (fresh) OR some red pepper flakes.
a variety of vinegars: red wine, rice wine (unsweet), regular white, sherry, apple cider.  NOT balsamic.  Try to use at least 2 or 3 different ones, depending what you have in the house.  Sherry vinegar is particularly good, I'd make an effort to acquire that (also delicious in salad dressings, and in this fajita marinade I'll share with you).
seasoned salt (I use Herbemare) if you have it-- if not, regular salt is fine.
 
Directions:
peel the cucumber (or peel every other strip, if it's an English cuke), cut it in half lengthwise (or quarters, if it's a monster like mine) and seed it, using a teaspoon to scoop out the seeds but not the firm flesh.
 
Cut into pretty fine sticks, and then across into small cubes or pieces. 
I used a mandolin slicer (like the one below) and a julienne blade, to get small matchsticks.


see the carrots? that's using the julienne blade (there's usually 2, a big one and a smaller one)


Cut enough red onion to give you about a third to half as much onion as cucumber. Cut into the same size as your cucumber, or slightly finer, if you didn't cut the cucumber small enough.
 
Combine the onion and cucumber in a bowl.
 
If you have a fresh jalapeno, cut it open, discard the seeds, and chop finely. Only use the seeds if you want it to be crazy spicy (which you don't).  Add to the cucumber/onion mix.
 
If you DON'T have a jalapeno sitting around (and unless I plan in advance, I don't), add a pinch of red pepper flakes. How much you use is up to you, but beware! The vinegar really brings out the heat (in my opinion) and letting it marinate develops that heat, so maybe use a bit less than you would think.  Like, start with 1/8th teaspoon and work your way up.
 
give the mix a sprinkle of salt (whichever type you are using).  A good 1/2 to 1 tsp.
 
Now add the vinegars-- you want to put in about equal amounts of the ones you are using, until the liquid reaches just about an inch or so below the level of the veggies in your bowl/container.

As I mentioned above, really try to get some sherry vinegar, it seems to make this dish (and the originator made sure to mention it to me).
Here are the vinegars I used. You could make it with 2 or 3, but make sure to use sherry vinegar.  And yes, I do have more vinegars that weren't appropriate for this recipe. 
 
Give the whole shebang a good stir, and cover (I make this right in one of those BIG Ziploc plastic containers instead of a bowl) and place directly in the refrigerator for a few hours, at least. Overnight is best.

The mix. I used pepper flakes instead of jalapenos.
I can't tell you how long it keeps in the fridge, because it's usually GONE in a day or 2.  I'd say they'd be fine for a week or 2 for sure.  I'd say longer, but you're not doing the whole hot-liquid, canning-jar thing.  And anyway, you'll eat it all up so storage isn't an issue :)
 
I can't do my regular nutrition analysis on these, since amounts vary.  But cucumbers are really low in calories, and onions aren't too bad, and you're not using any sugar.
 
OH-- if the marinade winds up too spicy, then do add a pinch of sweetener (splenda, xylitol, sugar, whatever you like)... that will counter the spiciness.
 

Monday, September 23, 2013

From the Oven: Making light of baking - Honey cake and Banana Yogurt cake/muffins

I've been wrapped up in the renovation, and then travel for work, and then getting really sick because of... well, who knows why one gets a stomach virus, but I can tell you that stress and travel don't HELP at all.

I'm starting to feel better, so I thought I'd update you with some baking experiments I've snuck in here and there (pre-and-post sickness, lest I bake the virus into something...).

It's starting to be Fall here in the northeast, and I didn't have a chance to get together with my family at the big family dinner in September, so I wanted to remind myself of "home" AND try out all my new counter space.

So I dug out my old food processor recipe book.

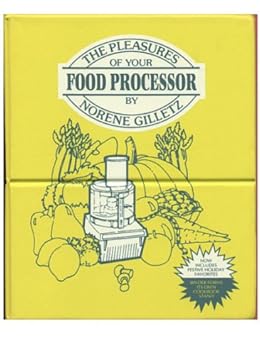
Don't snicker.  This was my second recipe book (more on my first, some other time) and food processors were making their way into home kitchens in the 80's.  This one, The Pleasures of Your Food Processor by Noreen Gilletz, is basically a version of Second Helpings Please, with the recipes tweaked for the processor (check out her other books as well... looks like the food processor one has a 30th anniversary update!).

I remember reading my mother's copy all the time. There were great tips at the start of most chapters-- like why your cake would have "tunnels" in it, different types of substitutions you could make for ingredients, and metric to Imperial conversions.

My copy has this neat feature where the cover bends back, so it becomes its own recipe stand!

The bend in the cover is so it can fold back and become a recipe stand. GENIUS!

I love a lot of the cake recipes from this book, and the two I've made recently are great in their original format.
However, since I'm watching my calorie intake, I decided to try to lighten up both recipes, and am delighted at my own success!

Honey Cola Cake
My all-time favorite honey cake recipe.  My mom and I aced this cake years ago, which was great because my Great-Aunt Celia also made Honey Cake yearly, but she burned the heck out of them (and I don't think she was aware), and so my first memories of honey cake are not the greatest... but this cake is foolproof, and really delicious.

The original recipe from the above book calls for brown sugar, eggs, 3/4c of oil, 1/2c of cola (could be regular or diet), 1c of honey, and the regular flour, baking powder and baking soda, cinnamon.

I swapped out the entirety of the oil for unsweetened applesauce, which brought the calorie count per slice (for 12 generous slices) down from 363 to 249.
This is a great trick, and can be used in any cake that calls for oil. Substitute some or all of the oil for unsweetened applesauce, which helps keep the cake moist.

By doing this, I lowered the fat from 15g per slice to 1g, and cholesterol became negligible.

I also swapped 1/3 of the brown sugar  for splenda (so 1/2c brown sugar and 1/4c splenda), and reduced the calories further to 232.
You can safely remove 1/4 to 1/3 of the sugar from any cake recipe-- in this case, I kept some in, for it's various properties (aside from sweetening, sugar adds texture, draws in and keeps moisture, adds to browning, tenderizing the gluten... this is why you can't just straight substitute sugar for Splenda or other non-sugar sweeteners, which don't all have these properties).


So the final count for this cake (1/12th) comes to:
232 calories
1g fat
53g carb
4g protein
1g fiber
7% calcium
10% iron
2% vitamin A
trace vitamin C

Here's how to make my lightened Honey Cola Cake:

Ingredients:
2 1/4 cups all-purpose flour
2 teaspoons baking powder
1 teaspoon baking soda
2 teaspoons cinnamon
1/2 cup brown sugar, packed
3 large eggs
1 cup honey
3/4 cup applesauce, unsweetened
1/2 cup diet cola
1/4 cup splenda (bulk)

Directions:
Heat the oven to 325 degrees. Make sure to do this 20-30 minutes before you start baking, to ensure the oven is at the proper temperature (the first beep isn't the right temperature... you basically need a good oven thermometer to ensure you're there).

Grease (or use a spray oil, like Pam) a 12" Bundt pan, or 10" tube pan.  You need that hole in the middle of the pan to ensure the cake bakes evenly.  You could try other pans, but will have to adjust the baking time.

First, combine the flour, baking powder, baking soda, and cinnamon until blended.
Put aside in another bowl.

Flour mix, set aside, and the applesauce, standing by.

Process the brown sugar splenda, and eggs for about 30 seconds.  Then add applesauce and honey, blend for another 90 seconds.
Eggs and sweeteners (splenda and packed brown sugar) before blending.
Remove processor cover, and add the dry ingredients, pour the cola over that. Pulse for 4-5 quick turns, just until the dry ingredients are incorporated (a few lumps are ok, you can grab those with your spatula).


Immediately pour the batter into your pre-greased pan. 

Before baking

Bake at 325 degrees for about 1hr, and check that the cake is done with a fork or toothpick-- stick it into the middle, and if it comes up pretty clean (a crumb or 2 is fine), you're set.

Also, when the cake starts to pull away from the sides, you are for sure done!
After baking. Yes, it is gorgeous!


Let cool in the pan for about 20 minutes, before you remove from the pan to cool on a cake rack. 

Look at that light texture! It's really a delicious and easy cake.
The cake keeps well (honey is a deterrent to weird things growing, and keeps it moist), and definitely freezes well.

*******************************************************************************************************


Similarly, I was able to convert my favorite banana cake recipe.  The recipe has yogurt in it for tang and to help leaven the cake (you'll see!).

In this case, I 
replaced the butter with unsweetened applesauce (which is a bit risky-- butter and oil are NOT the same, chemically speaking.  Butter has fat AND water, and milk solids, whereas oil is just a pure liquid fat.  But it seems to have worked), and replaced the 1.5 cups (!) of sugar with 1/2c brown sugar, 1/2c xylitol, and 1/2c splenda.
The brown sugar is more flavorful than white sugar, and contains molasses, which helps make it moist (and is where the brown flavor and color come from).  The Xylitol is a great sugar substitute, with good flavor and browning abilities-- I'm liking it more and more in my sweet treats.  Splenda just adds sweetness, but doesn't do much in terms of texture, which is why I needed the other sweeteners. It is the lowest calorie sweetener of the bunch.


The original recipe made 9 servings, which must've been HUGE... I decided to make muffins, and I made 18 muffins, so we'll compare against that number.

The original would've been 187 calories per muffin, with 6g of fat (3 saturated) and 38mg cholesterol
My lightened version  has 123 calories per muffin, 1g of fat, and 24mg cholesterol.
Lots of folate and B1

here's the stats for 1 of 18 muffins (I made 12 slightly bigger and 6 slightly smaller, but let's say I made them all even, and this would be the count):
123 cal
1g fat
24mg cholesterol
111mg sodium
101mg potassium
27g carb
6g fiber (some of this is how the xylitol is counted)
3g protein
4% calcium
5% iron
2% vitamin C
1% vitamin A
8% B1
7% Folacin

Ingredients:
2 large eggs
1/2 cup applesauce, unsweetened
1/2 cup brown sugar, packed
1/2 cup splenda (bulk)
1/2 cup xylitol
1 teaspoon vanilla
2 large bananas
1 teaspoon baking soda
3/4 cup greek yogurt 0% fat
1 teaspoon baking powder
2 cups all-purpose flour

Directions:
Heat your oven to 350 degrees.  Do this a good 20-30 minutes before you start baking.

In a food processor, combine the eggs, applesauce, sweeteners, and vanilla.  Whiz for 2 minutes, scraping down the bowl once.
While it's running, drop in the banana in chunks, and whiz until fully processed and smooth.

Meanwhile, in a 2c measuring cup or a bowl, mix 3/4c of yogurt (greek 0% or regular non-fat, or even regular yogurt of a different %, but you'll have higher calories), with the 1tsp of baking soda.
This will take about 2 minutes to DOUBLE IN VOLUME.
Have the kids watch that... :)

Mix the 2c of flour with the 1tsp of baking powder. Set aside.

Mix the yogurt/baking soda puff into the banana mixture with a few quick pulses.
Then mix in the flour/baking powder with about 4 quick pulses.

Pour into your muffin pans,  sprayed with Pam, or a well greased 9x9 pan, or a bundt pan... you can't really go wrong with this recipe.

Well, unless your oven isn't hot enough...then your muffins will be flat, like mine. The leaveners need a quick BLAST of high temperature to start working, and this is why pre-heating your oven is SO CRITICAL.
Let this be a lesson!!!

they still taste delicious though...
 
Yes, the muffins are flat. My oven wasn't hot enough.  Still delicious, but flat.

Bake for 40 minutes at 350 and check for done-ness.  Bake up to 50 minutes total. (Muffins take less time than a full pan of cake).
Easily frozen, and could be frosted if you like that kind of thing.


Wednesday, September 4, 2013

Kitchen Reno 2013: Day 15 and a few days after - DONE

Well, we were basically done on Day 14, which was a Friday.
However, we still needed some final electrical work, and that got done last Monday (apparently, Rob's golf game was rained out, so he acquiesced to come finish up).

In a mere 2 hours, Rob put together, and put up, the (if I say so myself) really nice ceiling fan.  We managed to closely match the floor color, and the metal matches our metals in the kitchen really well too.


We also got the pendants put up, and after only 3 different hardware stores, I found all the right dimmable LED bulbs (Note: not all LED bulbs are dimmable. When a bulb will last almost 20 years, you should make sure you have the right one).


There are some verrrrrry minor details that got touched up during the week, but nothing I'll call out here.

Now, the hard work, for us at least, began... cleaning and moving stuff back in, and finding the right place for everything, and more cleaning.

The cleaners came on Wednesday, and did a great job... returned the carpet on the stairs to pre-reno condition.  Cleaned the windows, the screens, mopped the floors two more times... we feel so light and clean again, I can't tell you how much better I feel about the house (and, well, everything), now that things are dust-less.

Thursday morning, the movers came to move the giant china cabinet back, as well as the boxes of dishes and cupboard items, and the tv and the cabinet upon which it sits.

They didn't send the same 2 guys as the first day, so they were SURPRISED at how heavy the cabinet was, but they didn't drop it, and after that, things rolled quite smoothly.

One weird thing-- while we were in the midst of moving, the neighbors (not the ones we share a wall with, but the ones on the other side-- they asked to see the house while the movers were here.
Well, ok... seemed like a harmless idea to me.

They were polite and took off their shoes, and then wandered around the first floor with me, commenting on how lovely everything was, and how EXPENSIVE it must be.

?

Did they think I was going to respond to that? Oh, why, yes, strangers, we spend X dollars on this renovation; I'm happy to share that personal information with you, of course.

They didn't just hint at wanting to know the price, they pretty much asked... I think I just smiled and nodded and said something like, Yep.  But I did NOT disclose.
Seriously... what nerve.

Anyway, when the lookie-loos were gone, the couch company called to schedule a delivery of the new sectional-- between 3 and 6pm (they called at 8:50am).  I said, No, I have to be downtown AT 6pm, and that just won't do. Is there anything you can do?
No.
How about tomorrow?
No, we can't guarantee that.
Well, we have a problem then, don't we.
Yes, well, ma'am, I'll call dispatch and see what I can do.

That long story somewhat shorter, when I called the dispatch a 1/2hr later, they had indeed moved our couch to the "express" truck, and it would arrive between 1pm and 4pm.

Guess when it showed up?
4:05pm.
Sigh.

And when they had it unpacked and in place, I had my only meltdown of this entire process.

Our plan was to have a compact sectional, and so we bought a 2 seat loveseat, then a rounded corner piece, and then this interesting angled piece, like a seat-and-a-half, called a "cuddler". 
When it was all put together (which we couldn't see in the store), it was like a very tight J.

I snapped.  You couldn't get into the seats, you couldn't put a coffee table anywhere, the whole thing looked too big, and I just freaked out.


Couch in the original configuration.  My friend David says it looks introverted, needs to come out of its shell

Also, it was REALLY hot out, I hadn't walked the dog yet (and he was having a pretty hard day, which is another story), I had spent the entire day unpacking the boxes (almost everything except the formal china) and didn't have a place for everything (which was upsetting me) AND we had to go this group dinner thing downtown AT 6:15pm, wearing all white and schlepping our own table/chairs/tablecloth/cutlery/wine glasses/food... and I just had HAD IT.

So, I called my darling hubby, asked him to come home asap, we were NOT going to the dinner in white, and we needed to solve this couch thing.

While he was coming home and I was walking the dog and feeling a bit relieved of the pressure of the whole white dinner silliness, I thought of a solution to the couch thing...
We do have enough space to unfurl the sofa by adding a couple of single-seat sections, and we were able to really test this out by taking the sections apart, and not only measuring for the new pieces, but our coffee tables fit in those slots just right (in the end, we just kept one spot open with the coffee table for now, and put the other coffee table at the end... guess that makes it an end table, eh?).


Imagine a seat where the table is, and another seat on the other side of the corner piece, and no end table on the left

 
Note, the rugs are for Haka. He's hating the floors, has wiped out (full Bambi) on them already. He did ok when they were dirty, guess he got some traction. Anyway, it's liveable for everyone now.

Over the course of the next few days and the weekend, and with hubby's help, we found spots for just about everything that matters (and I'm contemplating what to put in the less-reachable spots... things I don't use that often? why even give kitchen space to those things? hmmm...), and we hosted our first guest on Friday night!

So, our kitchen renovation is at a close.  Next week, I'll drop some gifts off for the contractors with thank-you notes. I thought they did a great job, stuck to their timelines, were respectful of our choices and requests, and kept the job momentum going right through the end.

Thank you for following our saga-- your reward is below, our final, picture perfect (before I moved stuff back in) pictures!


Powder room, before (you can't see the epically bumpy walls and paint errors on the ceiling):

Powder room - before

Powder room - after. You can't see it, but the walls are waaaaaaay smooth, and the ceiling doesn't look like a 5yr old painted it (no offense to 5yr olds)


Dining room, sort of before:

Sorry I didn't grab a full-length view of the room, but you see the color and the floor


View of the same wall, from further back

View from the window


I don't have before shots of these angles...so these next few are just "after":
Kitchen as seen from the French doors

Doors as seen from the kitchen


And the money shot:  my view every day when I work from home:


My view from the couch - before


Now, the plan for the new kitchen:


And, the final end result. Love it!

Trying to recreate the angle from the conceptual plan - the stool doesn't live there


And finally, my new work-from-home view:


Done!